


How to install wordpress is always a challenging question for beginners or sometimes for experienced professionals or bloggers who are not from IT or technical background.Below we are sharing step by step guidance to install wordpress along with images to make wordpress installation easy task for you. This can be used to install any wordpress version up to wordpress 4.0.
If you still found any error or need any extra assistance please drop a comment or your query at end of post so that concerned person from our team can assist you in installing wordpress.
Please share this article to your facebook,twitter or other social networking channels so that more people can took benefit of this information. You can also register to recieve future posts from us.
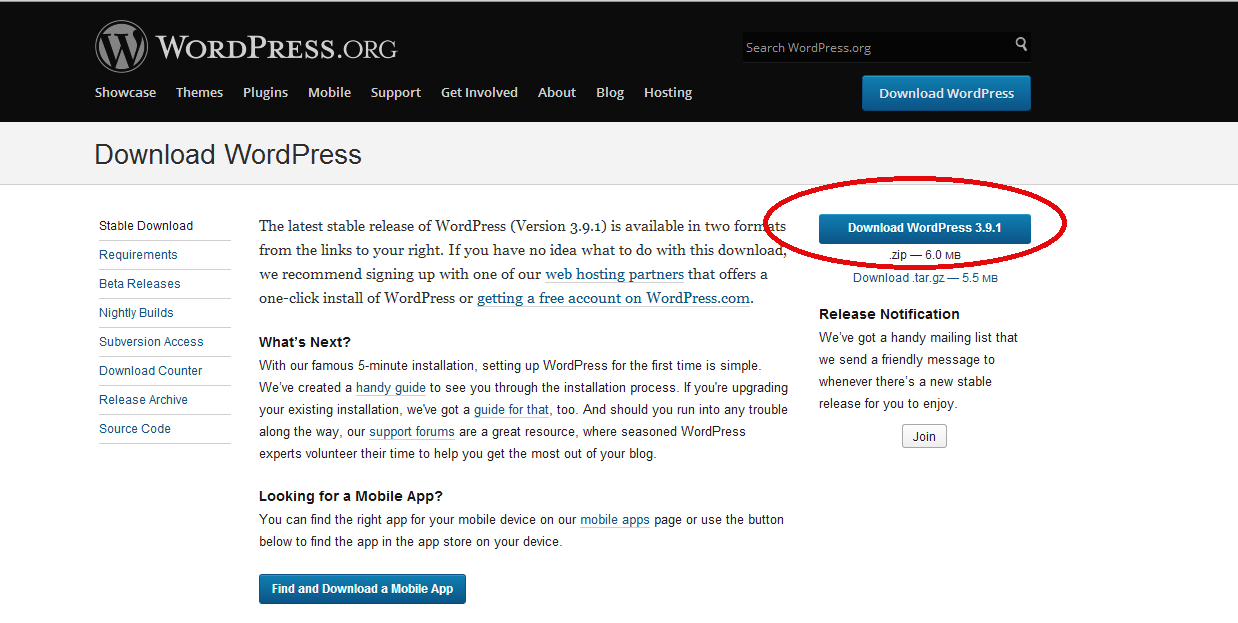
Step 1- Download the latest wordpress Installation package.
You need to download wordpress latest version or version of your choice from www.wordpress.org/download – refer screenshot here-
Step 2- Upload wordpress package to you server
You need to upload wordpress package zip file to your server either using FTP or by login your hosting panel. Please note that if you want wordpress to be the mail installation on your account and accessible through your main domain (www.example.com) than you need to upload files to your public_html folder.
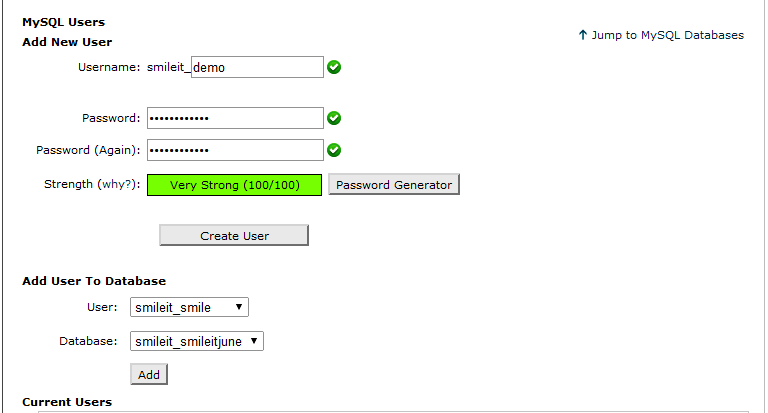
Step-3 Create database for your wordpress.
You need to create My SQL database in this step and please note down all these information as you will require them in later stage for configuration for wordpress please refer screenshot here-
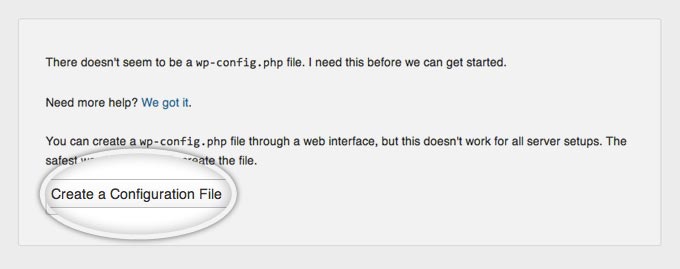
Step 4- Configuration of wordpress
Please make sure you have uploaded your wordpress in public_html and now open new tab in your browser and open your domain www.example.com for which you have uploaded wordpress in public_html. The first thing you will notice in your computer screen is a message, telling you that you don’t have a wp-config.php file and you should create one. Just click on the Create a Configuration File button to proceed. Refer screenshot here:
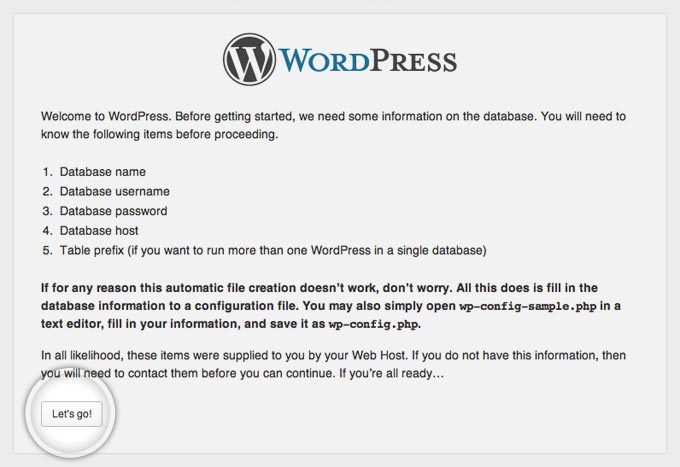
Step 5- Information to be entered for configuration
Now in next page there is a notification to create important information to be entered for configuration.
You don’t need to worry about this as this refer to creating MYSQL , so you already have all details so just proceed. Refer screenshot here
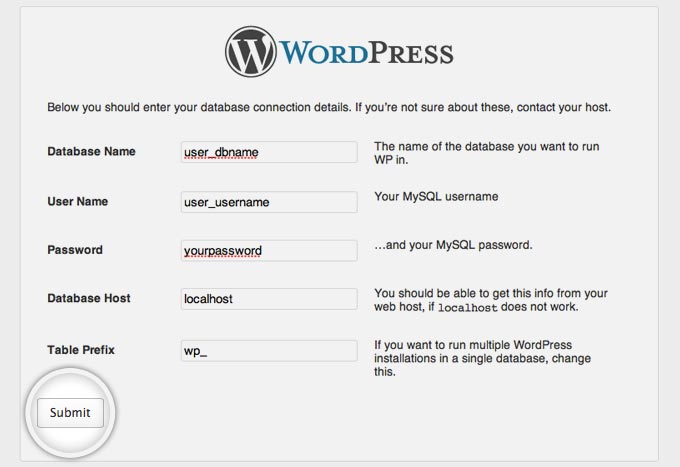
Step 6- Enter Details here
Enter the details for your newly created MySQL database and press the Submit button refer screenshot here-
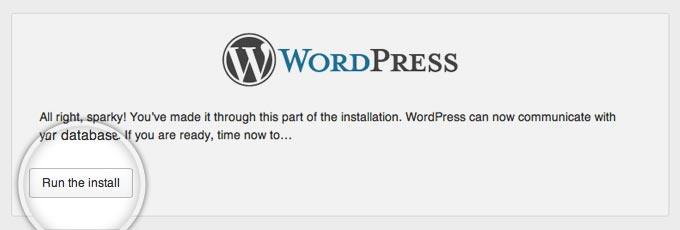
Step 7- WordPress check
WordPress will now check if your settings are correct. If you have entered all the necessary information, you will see a confirmation screen. Press the Run the Install button to proceed. Refer screenshot here-
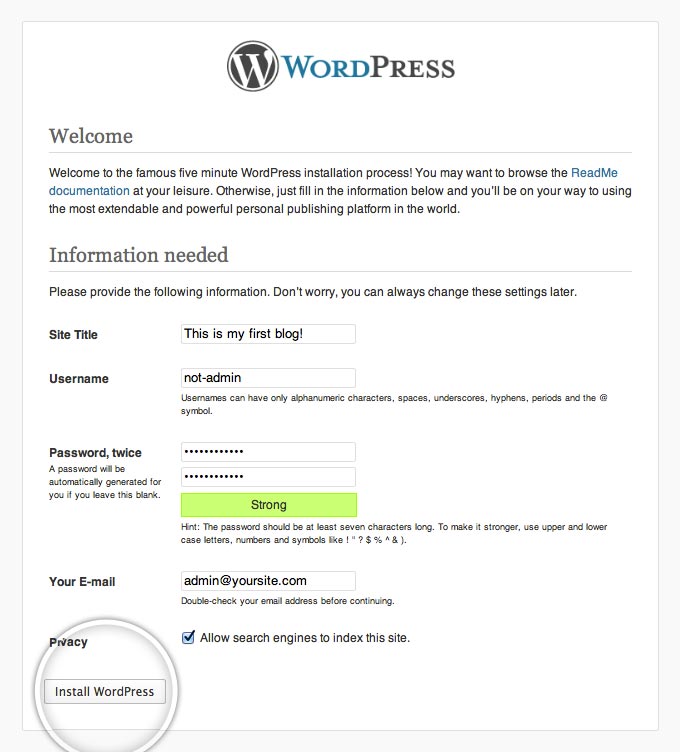
Step 8- Final Step
This is very important step . you will get a welcome screen where you need to enter new details about site like site tittle etc. Please make sure you click checkbox for allow search engine to index your site.
This is very important for SEO purpose making search engine aware that your site exists and they can crawl it to index. And than click button “install wordpress”. Refer screenshot here-
Confirmation message
In next screen you will get a confirmation message that –
“Your new WordPress application is installed. You can use the Login In button to access your administrative backend and start posting in your new site.”
For any other assistance on “How to install wordpress” please drop us a message in the comment section.


Post Your Comment
Comments